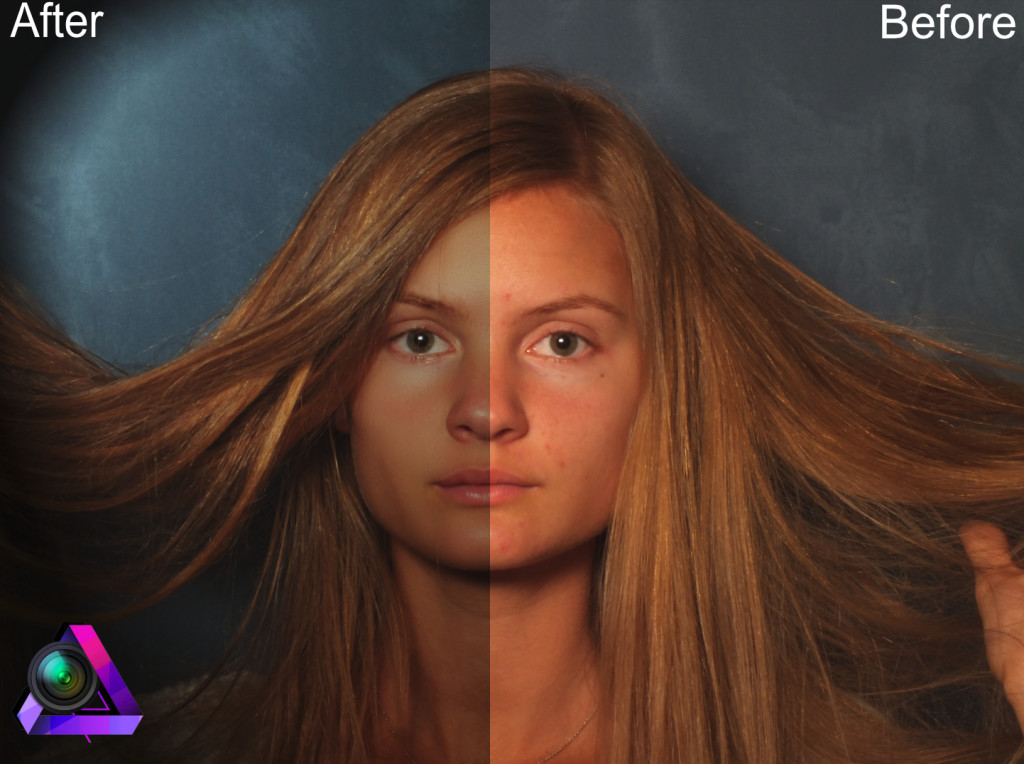
For a long time Photoshop has been the most used postproduction-software in the world. Since there has been no other softwares as good, or better than Photoshop, there has been no reason for Adobe to lower the price on Photoshop, or making the software better. Now theres about to be some changes at this point. Affinity Photo Beta is now out for testing. Affinity Photo is pretty much the same as Photoshop except for a few things.
Top 10 reasons to use Affinity Photo:
- Affinity photo got a shortcut for Frequency Separation (FS) making it easier and faster to retouch your portrait photos (you can read more about this further down on the page).
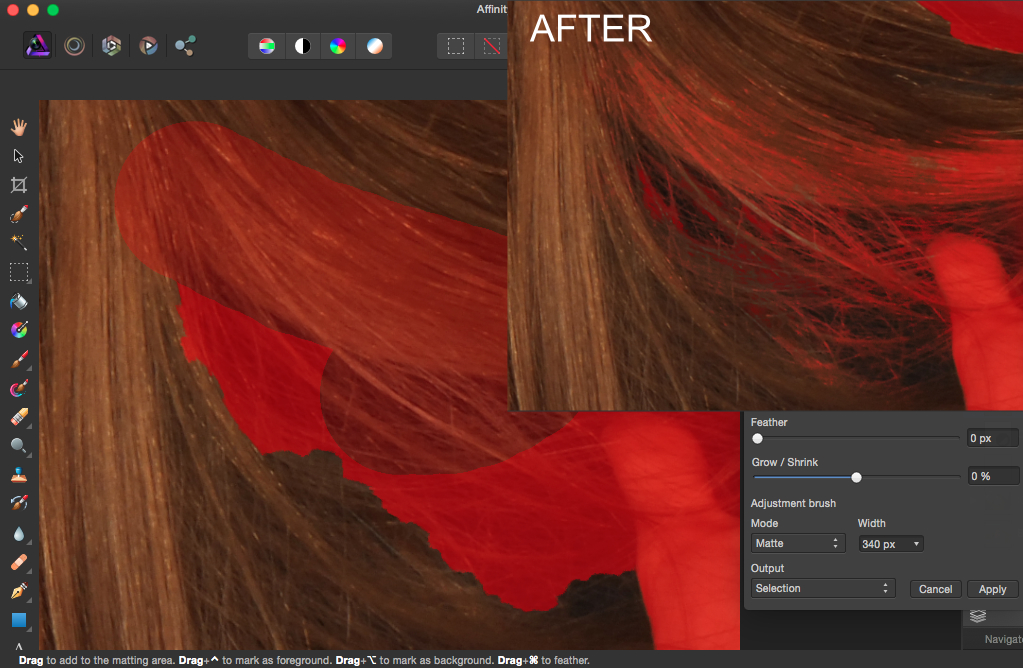
- Masking tiny strands of hair is now much easier. All you have to do is to mark the erea that is hard to mask, and Affinity does the rest (you can read more about this further down on the page).
- The inpainting brush lets you mark an area and make it disappear. Affinity copies parts of the surrounding environment to hide a part of the picture.
- “Macro Persona” is a library that contains tons of presets and actions to make your images colder, hotter or just make the photo more interesting.
- Its easy to motion blur when Affinity let you drag the object you want to blur in the direction you want it.
- By going to the history panel you can easily go back and forth through your work by dragging the position lever. This makes it easy to change parts of your image if you regret something you have done earlier in the postproduction-process.
- Affinity Photo has a unique perspective option that makes it super easy to make a pasted object fit into the background-picture.
- The liquify-tool gives you the opportunity to make masks wile liquifying. This will make it easy to liquify without changing unwanted parts of the picture. The liquifying tool also lets you se the warped grid, and gives you more control of what you are doing.
- You can export the project to a PSD-file! This opens for the possibility to use some of the tools from Affinity and still use Photoshop to other changes your already used to doing there. (Affinity also supports RAW)
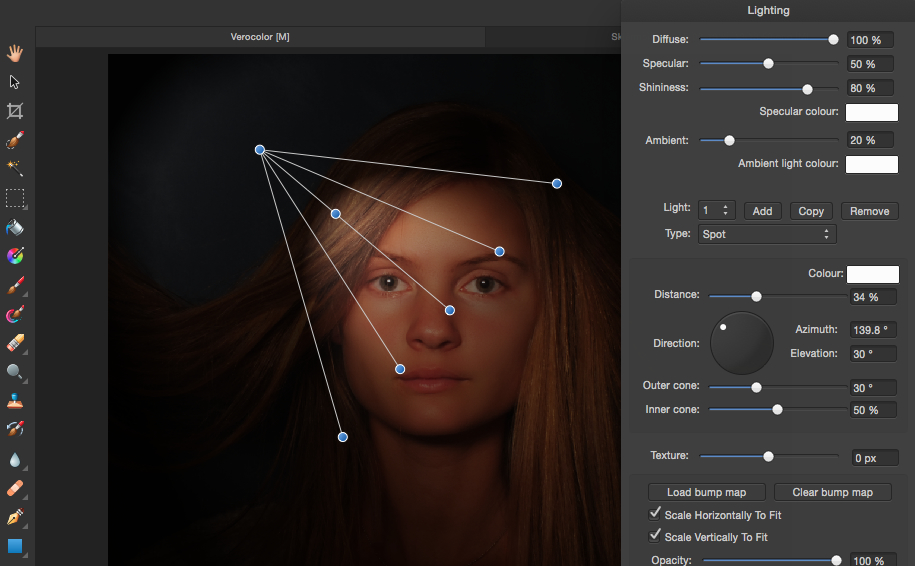
- The lighting options makes it easy to change your lighting settings and still make the photo look natural (you can read more about this further down on the page).
Affinity Photo is now making it easier and faster for retouchers to use Frequency Separation! This means you can now go to the “Filter” drop down menu and select FS. From here Affinity makes you two layers. One with the low frequencies (Skin color) and one with the high frequencies (Texture). If you don’t know what FS is its a way to make the skin look softer without blurring and making the texture go away. I used FS on the Before and After picture above.
Affinity Photo also got a really nice way to select hair in the refine menu. The option lets you mark tiny strands of hair only by painting ruffly over them. It also removes the parts behind the hair if it thinks its not supposed to be there. In the picture below all I did was drawing over the parts of the picture that wasn’t selected, and Affinity did the rest:
Affinity Photo has a really nice lighting setup thats really easy to use, and can give you some nice results and cool lighting in your photos. You can add point, Spot or direction and much like in Photoshop you get to change lots of different settings on the lighting. You can also copy or add more than one light.
Affinity Photo Beta is currently just for Mac but I assume they will be making a version for Windows later. To get your free download of the beta version klick here.


